Support & User Guide
Everything you need to scan books, create PDFs, and manage your digital library.
Getting Started
Setting Up Your Scanning Stand
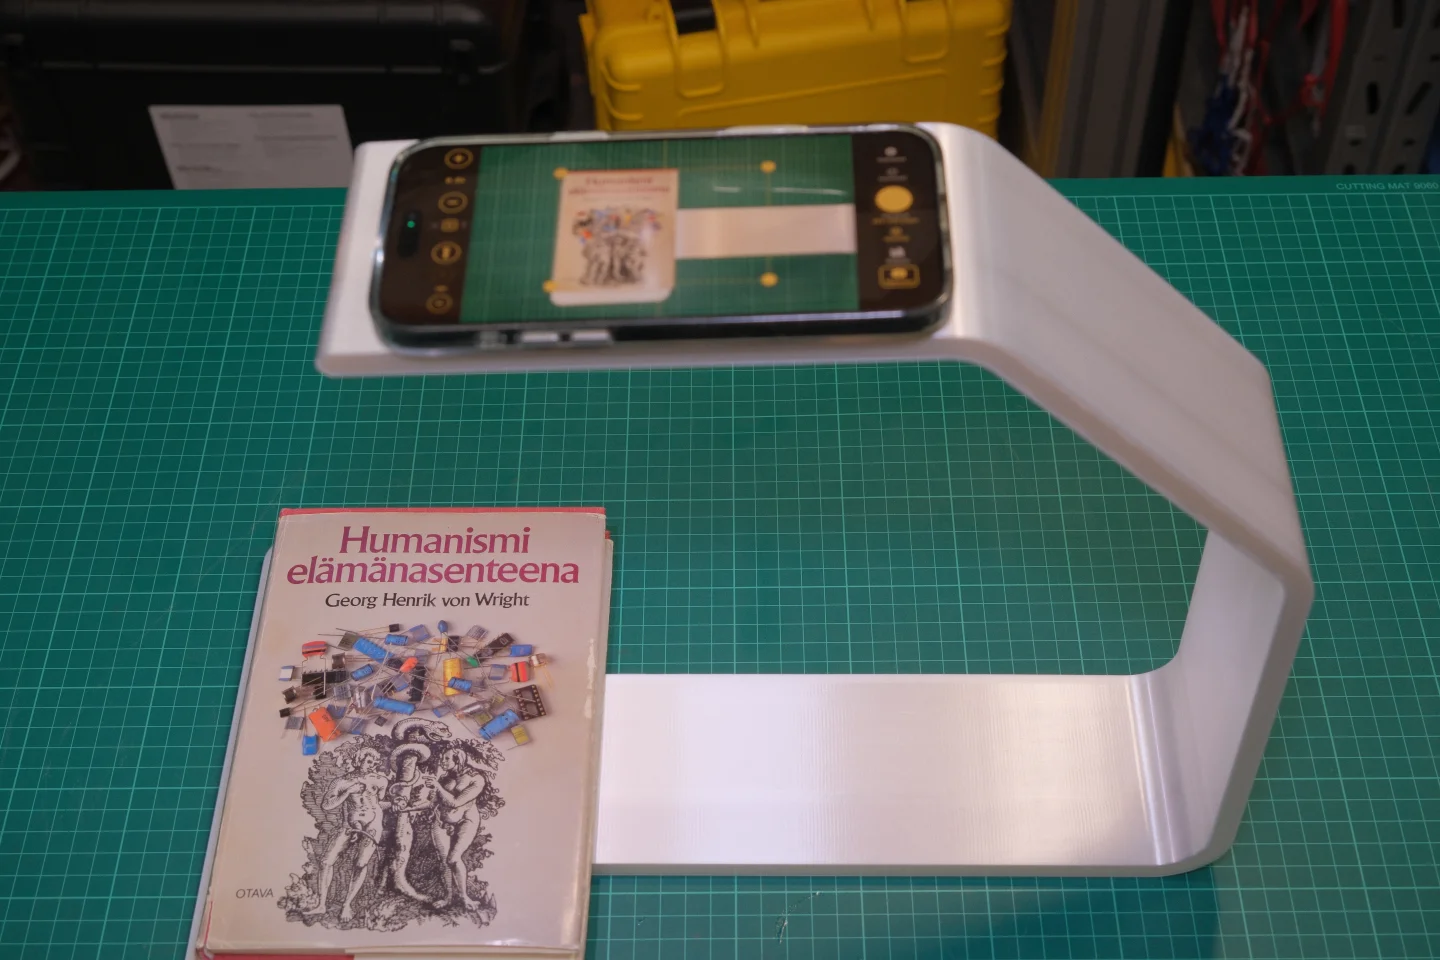
Knut works best with a physical scanning stand. The stand holds your iPhone above the book so the camera can see both pages at once.
Setting Up Your Scanning Stand
- Place the scanning stand on a flat, stable surface such as a desk or table.
- Put your iPhone into the stand's phone holder with the camera facing down.
- Open the book and lay it flat under the stand. The book spine should be roughly centered under the camera.
- Open the Knut app. The camera preview shows what the camera sees.
Tips for the best setup:
- Use a well-lit room. Even, diffused lighting reduces shadows on the pages.
- Avoid direct overhead lights that create glare on glossy pages.
- Keep the book as flat as possible. Press gently on the pages if they curl up.
- Position the book so both pages are fully visible in the camera preview.
Your First Scan
- Open the app. You start on the Scan view.
- Position your book under the scanning stand.
- Adjust the crop rectangle so it covers both pages.
- Tap the gold Scan button to capture. The app automatically splits the image into two separate pages.
- Turn the page and repeat.
- When you are done, tap New Book in the sidebar. Your PDF is generated automatically and saved to the Library.
Scan View
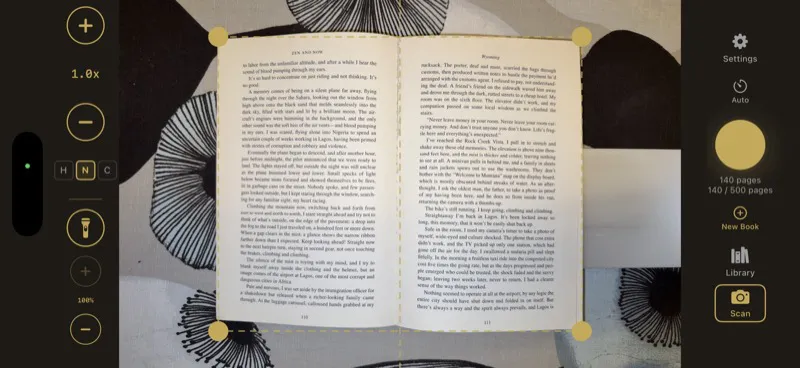
The Scan view is the main screen of the app. It shows a live camera preview of your book and provides all scanning controls.
Scan View
Screen Layout
- Left side: Zoom controls, quality selector, torch button, zoom level indicator
- Right side (sidebar): Settings, Auto-Capture toggle, page counter, New Book, Library, Scan button
- Center: Camera preview with crop rectangle overlay and center spine line
Capture Button
The large gold button labeled Scan at the bottom-right captures the current view. Each capture takes a photo of both visible pages and automatically splits them into two separate page images.
After each capture, a brief flash animation confirms the photo was taken. The page counter in the sidebar updates to show the new total.
Smart Auto-Capture
Smart Auto-Capture lets you scan hands-free. Instead of tapping the Scan button for every page, the app detects when you have turned to a new page and captures automatically.
- Tap Auto in the right sidebar to turn on Smart Auto-Capture.
- The app uses edge detection to monitor the camera preview.
- When it detects that the page has changed and the book is stable, it captures automatically.
- After each capture, it waits for the configured pause duration before looking for the next page change.
| Setting | Description |
|---|---|
| Capture Pause | Capture Pause |
| Fallback Timeout | Fallback Timeout |
| Detection Threshold | Detection Threshold |
- Keep your hands out of the camera view after turning the page. The app waits for a stable image.
- If the app captures too early, increase the Capture Pause.
- If the app does not capture at all, try lowering the Detection Threshold to 90%.
- Good lighting helps edge detection work reliably.
Manual Capture
If you prefer full control, leave Smart Auto-Capture off and tap the Scan button for each capture. This is useful for books with unusual layouts or when you want to be selective about which pages to scan.
Edge Detection & Crop Rectangle
The gold dashed rectangle on the camera preview shows which area will be captured and split into two pages. A vertical center line marks where the left and right pages divide.
- Drag any of the four gold corner handles to resize the rectangle.
- The crop rectangle uses mirror symmetry: when you move one corner, the opposite corner moves symmetrically. This ensures both pages have the same dimensions.
- Position the rectangle so it tightly frames both pages. Exclude the book spine gap and any area outside the page edges for the cleanest results.
- Your crop rectangle position is remembered between sessions.
Center Line
The vertical line in the middle of the crop rectangle marks the split point. The area to the left becomes one page, and the area to the right becomes another. Align this line with the book spine.
Zoom Controls
- + and - buttons: Tap to zoom in or out in steps.
- Zoom slider: Drag the vertical slider to adjust zoom smoothly.
- Zoom level indicator: Shows the current zoom level (for example, 0.7x, 1.0x, 1.8x).
Adjust zoom so both pages fill the crop rectangle as much as possible. More zoom means more detail, but make sure the entire page area stays inside the rectangle.
Torch (Flashlight)
The torch button (lightbulb icon) on the left side turns your iPhone's flashlight on or off. Use the torch when scanning in dim environments.
Tap the lightbulb icon to toggle the torch on or off. The torch state and brightness are saved between sessions.
The torch may create glare on glossy or coated pages. If you see bright spots in the preview, try adjusting the book position or use ambient lighting instead.
Quality Selector
The quality selector is on the left side, shown as three small buttons labeled H, N, and C. The selected quality applies to all pages captured in the current session. You can change it at any time.
| Option | Description |
|---|---|
| H (High) | Full camera resolution, 95% JPEG quality. Best for archival quality, detailed diagrams, fine print. |
| N (Normal) | Short side capped at 2048px, 80% JPEG quality. Good balance of quality and file size for everyday scanning. |
| C (Compact) | Short side capped at 1024px, 65% JPEG quality. Best for quick reference scans and saving storage space. |
- For textbooks and study materials, Normal works well.
- For art books, maps, or documents with small text, use High.
- If you are low on storage or only need quick notes, use Compact.
Capture Preview
After each capture, the screen briefly flashes white to confirm the photo was taken. The page counter in the sidebar updates immediately.
Page Counter
The page counter in the right sidebar shows two numbers: how many pages you have scanned in the current book, and your trial limit (for example, "140 / 500 pages"). This helps you track progress during a scanning session.
Library
The Library is where all your scanned books and PDFs are stored. Tap Library in the bottom navigation bar or sidebar to open it.
Library
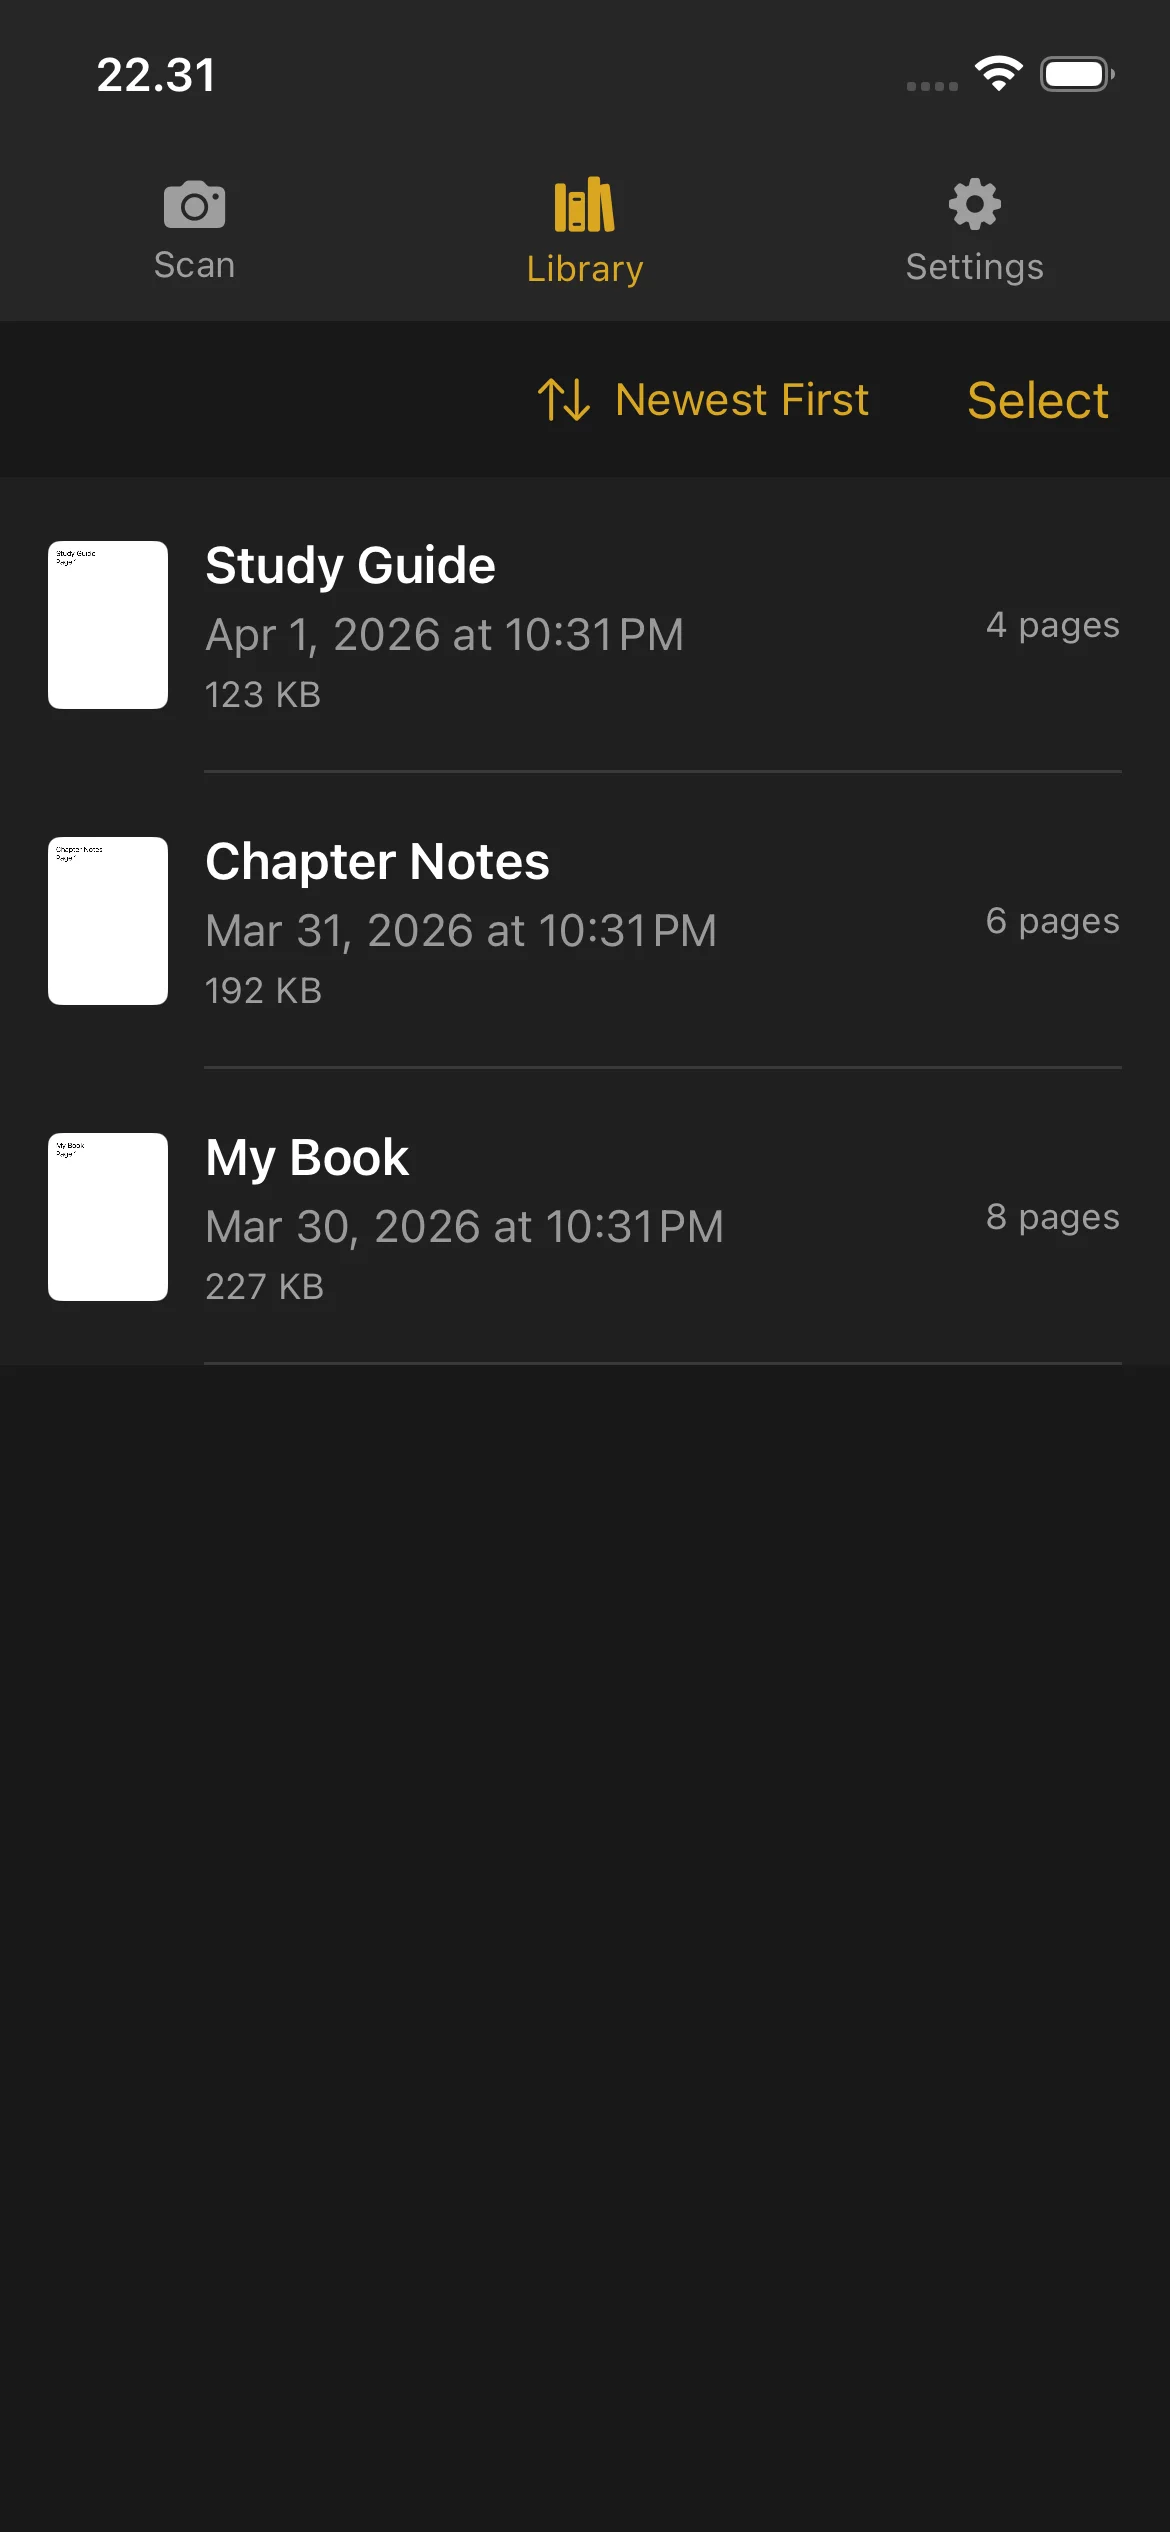
Viewing Your Books
- A thumbnail preview of the first page
- The book title
- Creation date and time
- Number of pages
- File size (for completed PDFs)
Books that are still being scanned show a Scanning badge and a Continue button. Tap Continue to go back to the Scan view and add more pages.
Completed books show a page count and file size. Tap a completed book to open the PDF preview.
PDF Preview
- Scroll through all pages
- Pinch to zoom in on details
- Swipe left and right to navigate between pages
- Use the page scrubber bar at the bottom to jump quickly to any page
Renaming a Book
- Swipe left on the book you want to rename.
- Tap the Rename option.
- Type the new name and confirm.
Books are named automatically when created (using the date and time). You can rename them to something more descriptive at any time.
Deleting a Book
- Swipe left on the book you want to delete.
- Tap Delete.
- Confirm the deletion.
Deleted books cannot be recovered. Make sure you have exported or shared the PDF before deleting.
Deleting a book does not reset your trial page counter. Pages that were scanned still count toward your trial total.
Sharing and Exporting
Single book:
- Swipe left on the book.
- Tap Share.
- Choose where to send the PDF: AirDrop, email, Files, or any other app that accepts PDFs.
Multiple books:
- Tap Select in the top-right corner of the Library.
- Tap each book you want to share.
- Tap the Share button that appears.
- Choose your export destination.
Sorting
- Date (Newest) — Most recently created books first
- Date (Oldest) — Oldest books first
- Name (A-Z) — Alphabetical order
- Name (Z-A) — Reverse alphabetical order
- Size (Largest) — Largest file size first
- Size (Smallest) — Smallest file size first
Your sort preference is saved and used every time you open the Library.
Disk Space Indicator
When your device is running low on storage, a warning banner appears at the top of the Library. This reminds you to free up space before scanning more pages. You can delete old books or export them to another location to free up space.
Settings
Open Settings by tapping the gear icon in the navigation bar or sidebar.
Settings
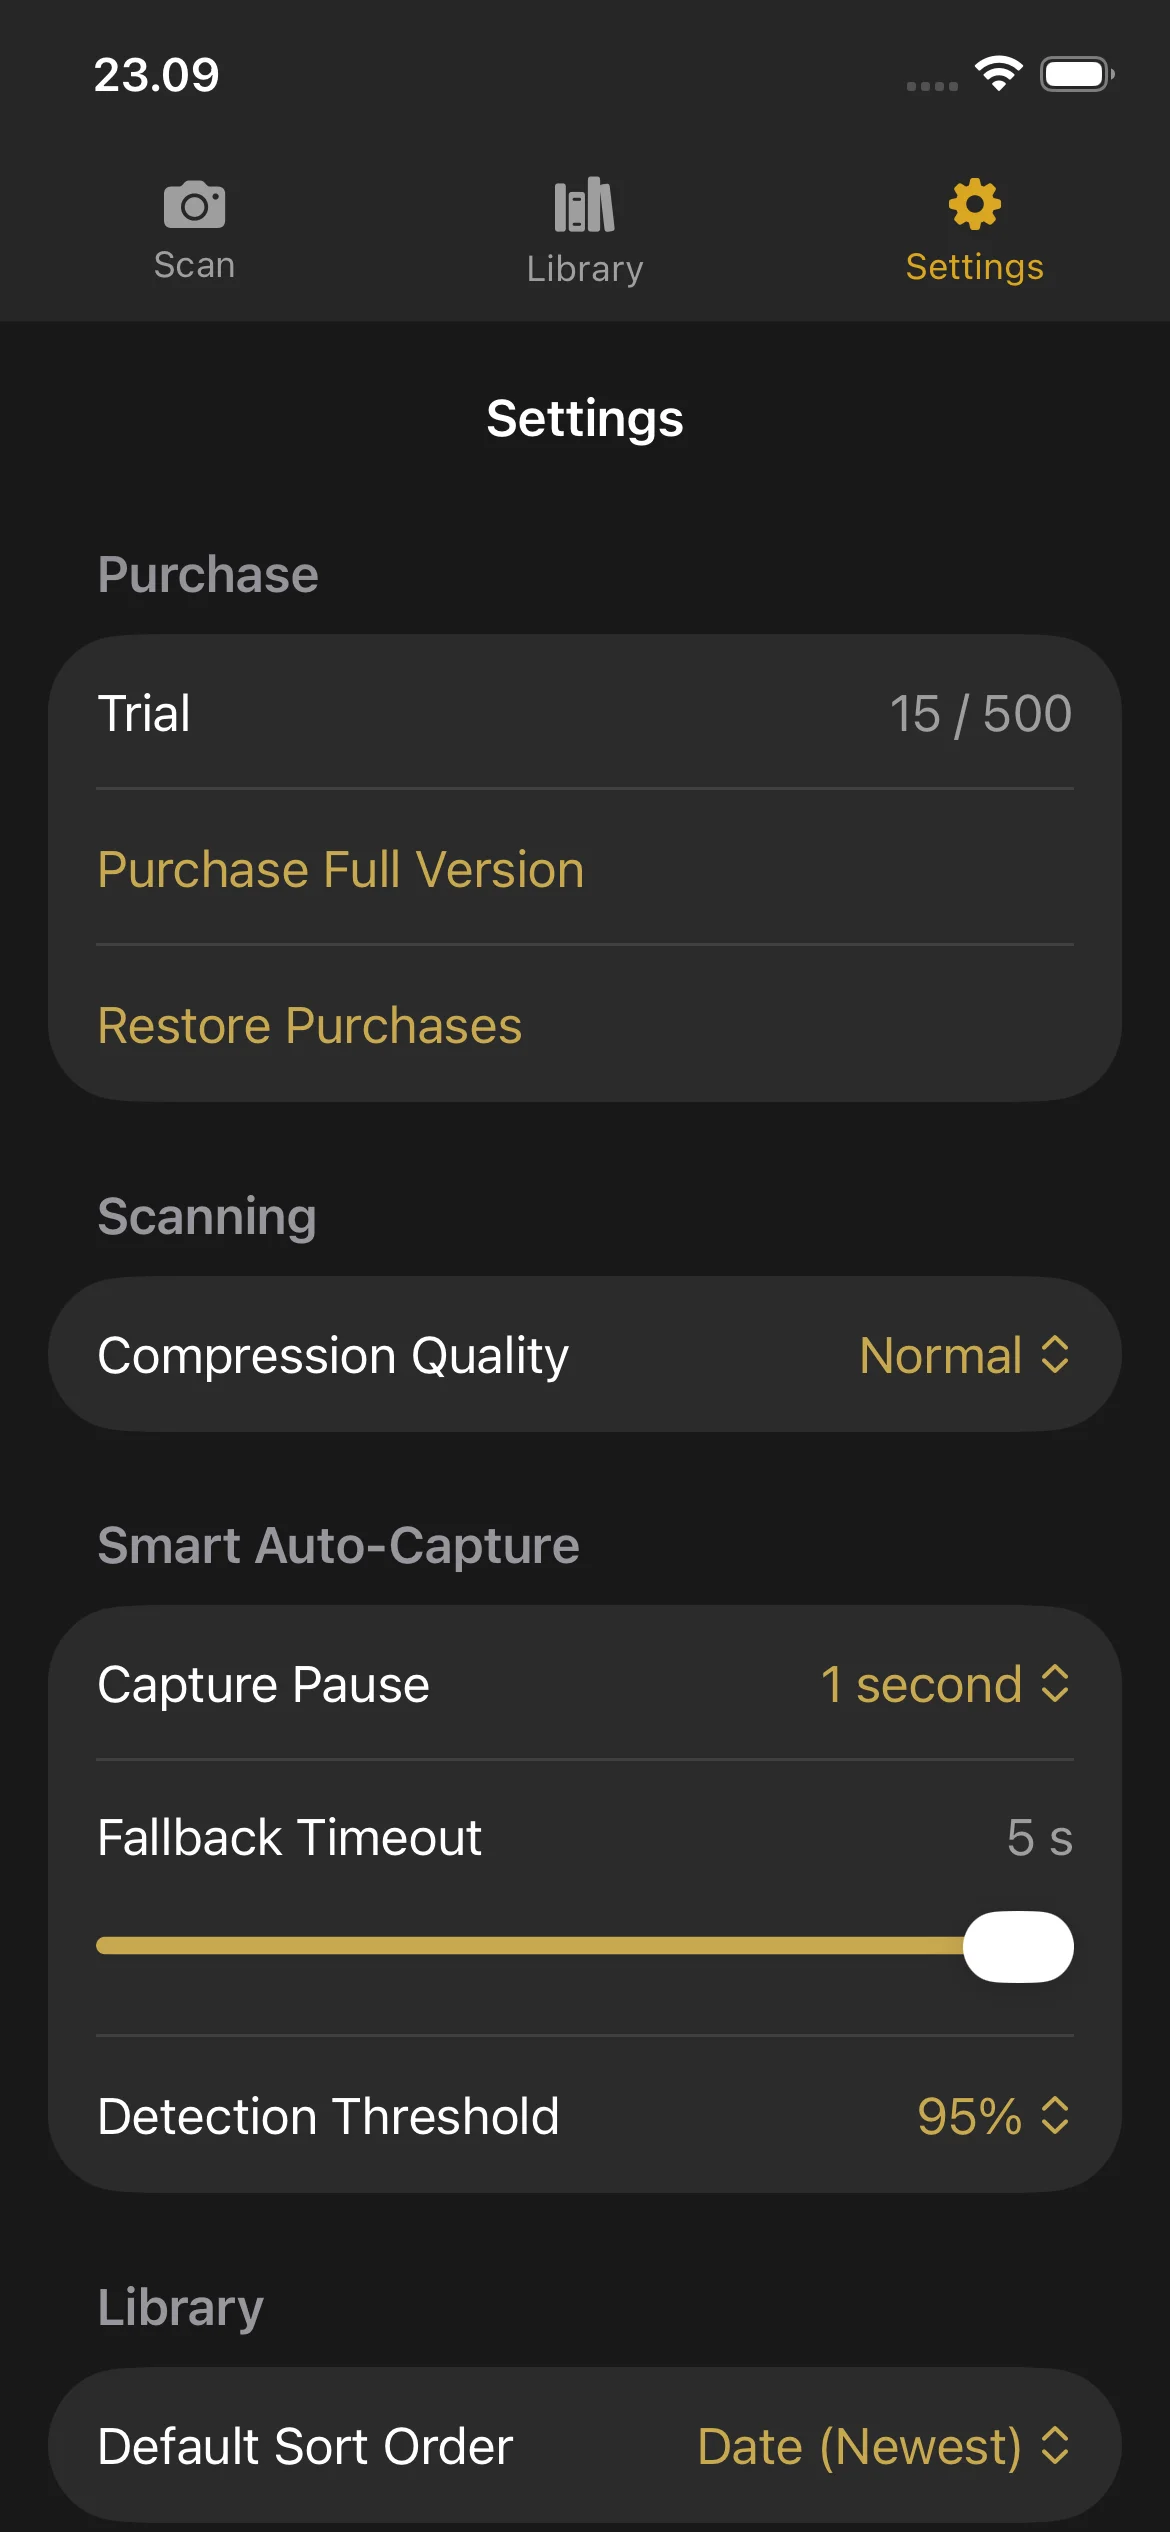
Purchase Section
- Trial: Shows your current page count and the trial limit.
- Purchase Full Version: Opens the purchase screen.
- Restore Purchases: Restores your purchase if you bought Knut on another device or after reinstalling.
Compression Quality
Choose the image quality for scanned pages. Changing this setting here also updates the quality selector in the Scan view.
Smart Auto-Capture
| Setting | Description |
|---|---|
| Capture Pause | Capture Pause |
| Fallback Timeout | Fallback Timeout |
| Detection Threshold | Detection Threshold |
When to adjust these settings:
- Capture Pause: Increase if you need more time to turn pages. Decrease for faster scanning.
- Fallback Timeout: Lower this if you want the app to capture more aggressively. Raise it if the app captures at the wrong time.
- Detection Threshold: Lower this if Smart Auto-Capture is not triggering. Raise it if the app captures before you finish turning the page.
Default Sort Order
Choose how books are sorted in the Library by default. The options are the same as described in the Library section above.
Trial & Purchase
Trial & Purchase
Free Trial
Knut comes with a free trial of 500 pages. You can scan up to 500 pages across any number of books before deciding to purchase.
- The page counter is shown in the Settings view and in the Scan view sidebar.
- Each capture adds 2 pages to the counter (one left page, one right page).
- The counter tracks total pages scanned across all sessions. Deleting a book does not reduce the counter.
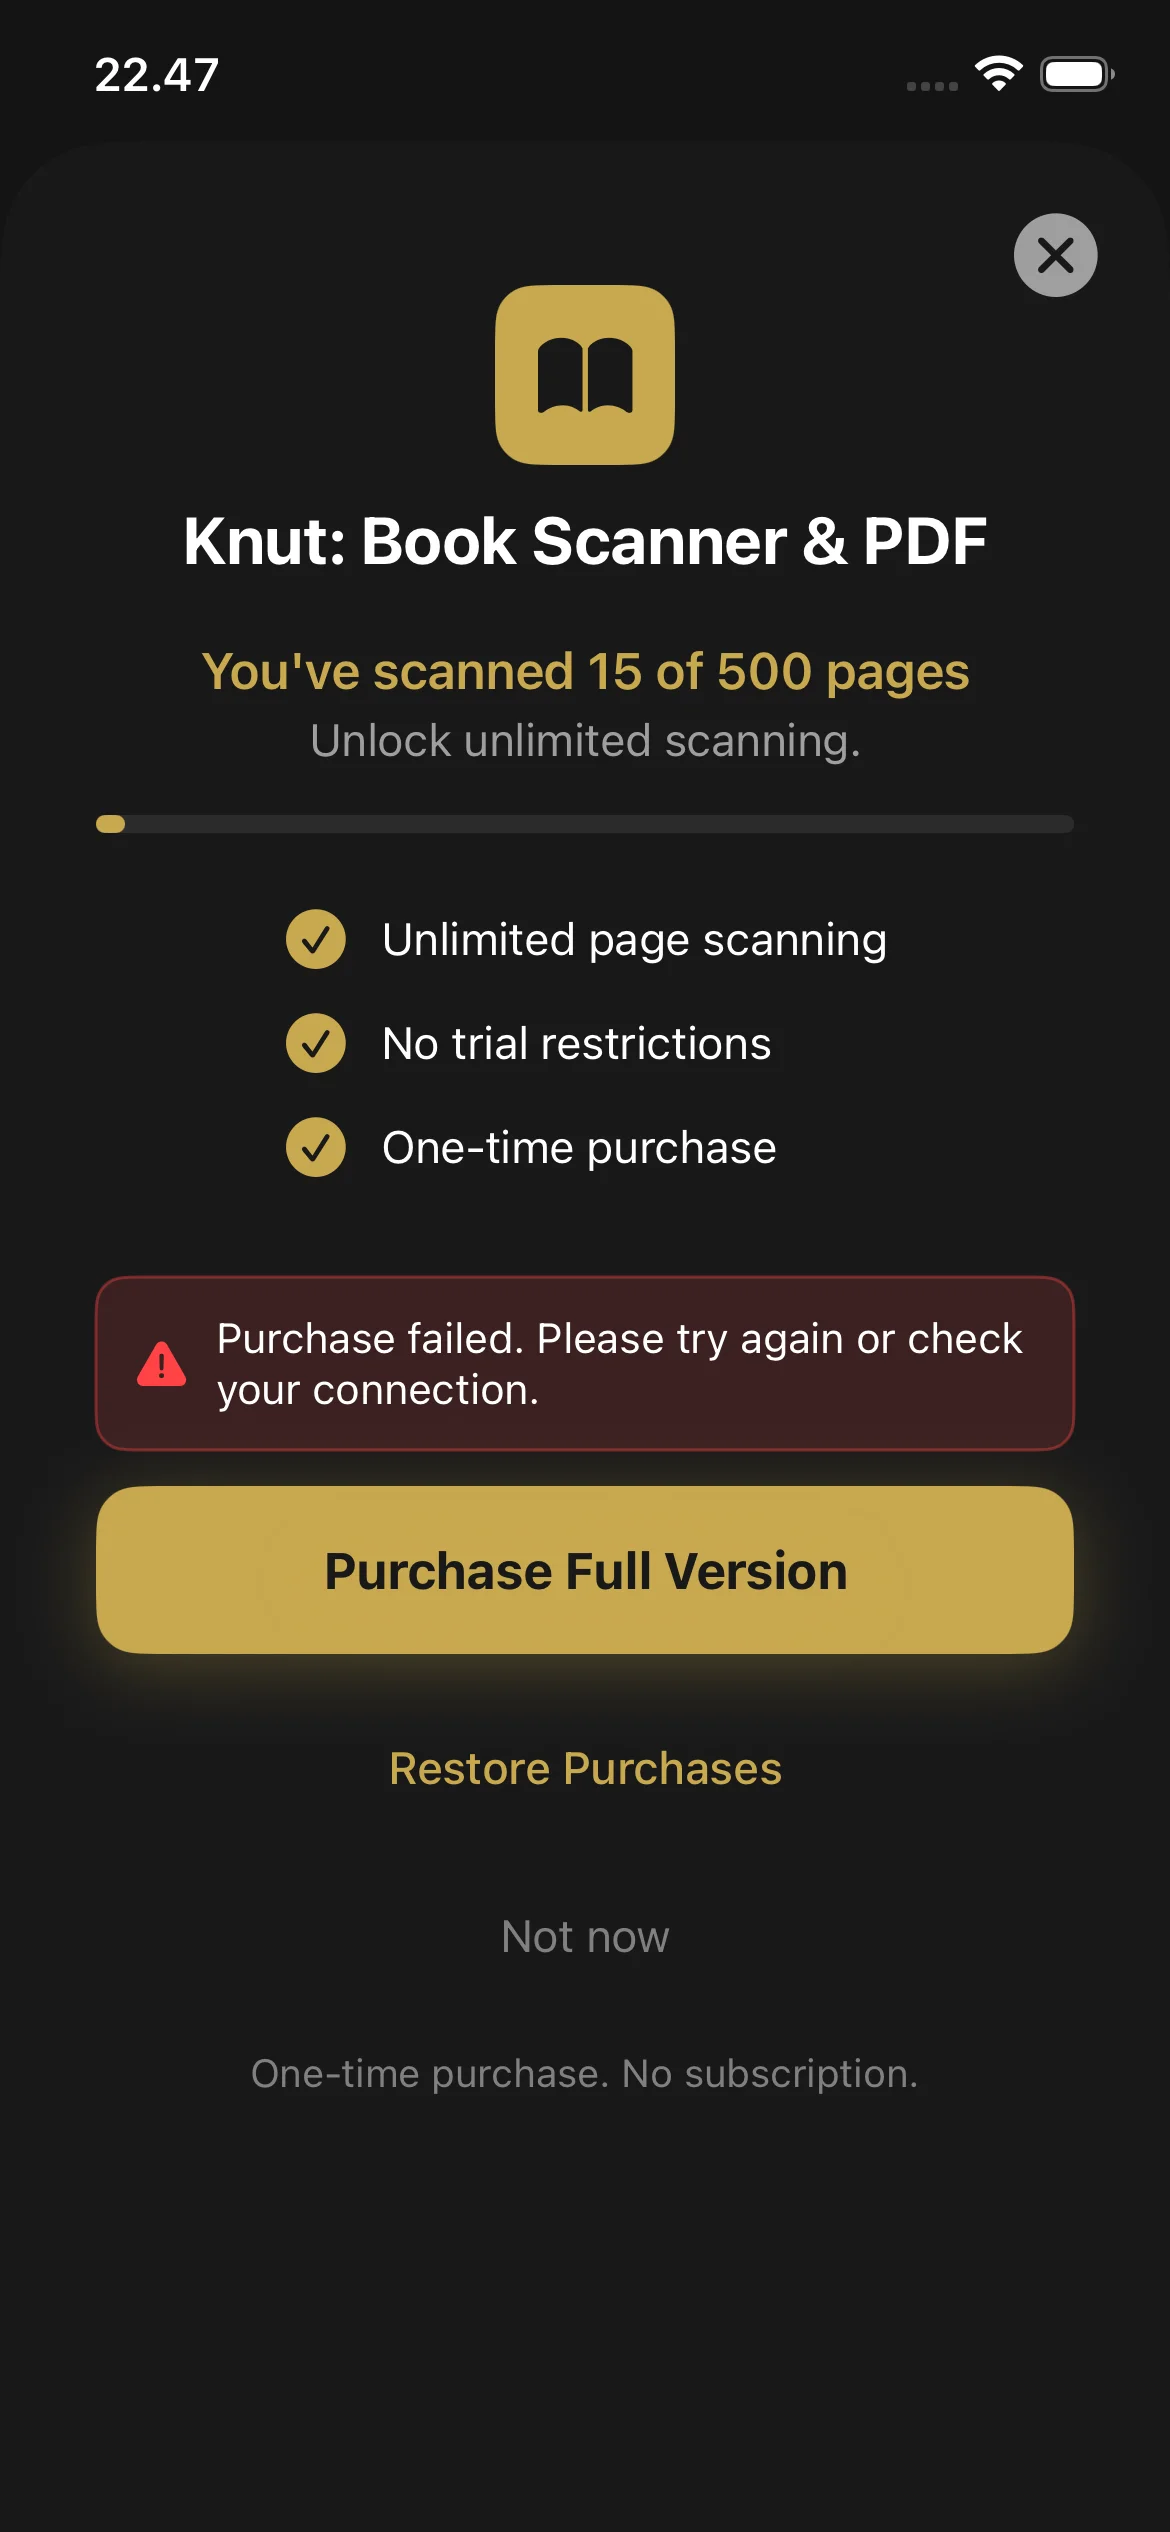
What Happens When the Trial Ends
When you reach 500 pages, the app shows a purchase screen. You cannot scan new pages until you purchase the full version. You can still:
- View and read all your existing PDFs in the Library
- Share and export your existing PDFs
- Rename and delete books
How to Purchase
- When the trial limit is reached, the purchase screen appears automatically. You can also open it from Settings > Purchase Full Version.
- Tap Purchase Full Version ($2.99, one-time purchase).
- Confirm with Face ID, Touch ID, or your Apple ID password.
- Once purchased, page scanning is unlimited. There is no subscription and no recurring charges.
Restore Purchases
- Go to Settings.
- Tap Restore Purchases.
- Your purchase is verified with the App Store and scanning is unlocked.
Troubleshooting
Still Need Help?
If you have a question not answered in this guide, review the Troubleshooting section above for common issues.